Showing posts with label recipe. Show all posts

Sunday, November 4, 2012

Cherry Cream Cheese Coffee Cake


You can thank Pinterest and a crappy mood for this one.   I have a board on Pinterest for dessert recipes I want to try and have had this one on there for a bit. I was in a bad mood the other day and sometimes baking helps, so I went looking and decided on this one.

I have to say that this was very easy to make and it tastes wonderful.  I brought in a piece to a co-worker and he wants to send me home with lots of tupperware to be returned filled with this cake. 

I do have to admit that while I love almond extract, I did find it a bit over-powering in this coffee cake. I would use maybe 1/4 teaspoon, maybe 1/2.  When, not if, I make this again I won't use a full teaspoon.  My co-worker didn't have a problem with the amount of almond taste though, so maybe it's just me. 

This recipe was found on Amanda's Cookin', I copied the photo's from there as well. However I will say that mine looks very similar to hers.

Cherry Cream Cheese Coffee Cake
adapted from Taste of Home
2-1/4 cups all-purpose flour
3/4 cup sugar
3/4 cup cold butter, cubed
1/2 teaspoon baking powder
1/2 teaspoon baking soda
1/2 teaspoon salt
1 egg, lightly beaten
3/4 cup sour cream
1 teaspoon almond extract
FILLING:
1 package (8 ounces) cream cheese, softened
1/4 cup sugar
1 egg, lightly beaten
1 can (21 ounces) cherry pie filling
1/2 cup slivered almonds (I didn’t use these)
In a large bowl, combine flour and sugar. Cut in butter until crumbly. Reserve 3/4 cup crumb mixture. Add the baking powder, baking soda and salt to remaining crumb mixture. Stir in the egg, sour cream and almond extract until blended. Press onto the bottom and 1 in. up the sides of an ungreased 9-in. springform pan with removable bottom.
For filling, in a large mixing bowl, beat cream cheese and sugar for 1 minute. Add egg; beat just until combined. Spread over crust. Carefully top with pie filling. Sprinkle with almonds and reserved crumb mixture.
Bake at 350° for 50-60 minutes or until center is set. Cool on a wire rack. Carefully run a knife around edge of pan to loosen; remove sides of pan. Store in the refrigerator. Yield: 8-10 servings.

Sunday, October 21, 2012

Chocolate Chip Cookie Pie Recipe

This is another recipe that I saw on Pinterest and pinned for the future.  Husband was off work one day last week and must have been looking up recipes on the internet because when I went to use the ipad later that night and opened up the internet browser, I was greeted with a recipe.  I looked at it, then switched to pinterest and my board of dessert recipes I want to try and had him browse it. He decided on this recipe.

After making it, I'm torn.  It was super easy to make.  I mean, you can't really get any easier than this.  I think it does taste like a chocolate chip cookie.  I think I just don't see the point in making this over a chocolate chip cookie. Maybe because it's easier?  I don't know.   It is very tasty. I could see making this and taking it somewhere if I wanted to bring an easy dessert but wanted it to be a bit fancier than regular chocolate chip cookies.    As for just making it for us for at home, I probably won't do it again.

The recipe was posted on Bakerella's blog.  (It's also where I stole the photo).

Chocolate Chip Cookie Pie
1 unbaked 9-inch (4-cup volume) deep-dish pie shell*
2 large eggs
1/2 cup all-purpose flour
1/2 cup granulated sugar
1/2 cup packed brown sugar
3/4 cup (1 1/2 sticks) butter, softened
1 cup (6 ounces) semi-sweet chocolate morsels
1 cup chopped pecans (optional)
Serve with ice cream (optional)

Preheat oven to 325 degrees F
Beat eggs in large mixer bowl on high until foamy
Beat in flour, sugar, and brown sugar.  Beat in butter.
Stir in morsels and nuts.  Spoon into Pie shell
Bake for 55-60 minutes. Cool on wire rack. Serve Warm

Recipe from Nestle Classic Recipes, 2003


Sunday, October 14, 2012

Cranberry-Nut Bread

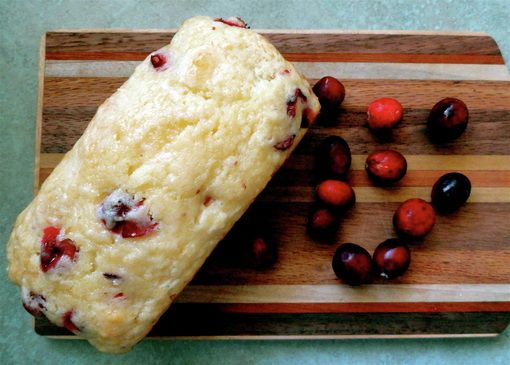
I have a problem. I love to bake.  I have another problem, I don't always want to eat it for health reasons.   You know what this means?  I often will find somebody to bake for.  That's what happened with this recipe.  A friend completed their third half ironman this summer and placed first in their age group, so I offered to bake them something in celebration.  They requested Cranberry-nut bread.

I have never made or eaten cranberry-nut bread.  Hmmm..  Thanks to Pinterest I was able to find several recipes and picked one I felt looked promising.   Since this recipe only made one bread, I have no idea what it tasted like. I did try some left-over batter from the bowl.  To me the batter was good but the orange juice was very strong.   I asked my friend for feedback and was told this was very good.  I do plan to make it for myself at some point, but there are just too many other recipes I want to try for it to me anytime soon. ha

I found this recipe on Anecdotes and Apple Cores, it's also where I stole the photo.


Cranberry-Nut Bread

2 cups all-purpose flour
1 cup sugar
1 tsp salt
1 tsp baking powder
1/4 tsp baking soda
1/3 cup whole milk
1/3 cup sour cream
6 TBSP unsalted butter, melted and cooled
1/3 cup orange juice
1 large egg
1 1/2 cups fresh or frozen cranberries, chopped coarse
1/2 cup walnuts (optional)
Glaze
1/2 cup powdered sugar
1-3 TBSP orange juice

1. Preheat your oven to 350 degrees.  Grease an 8.5 by 4.5 inch loaf pan or four mini loaf pans.

2. Whisk together your flour, sugar, salt, powder, and soda in a large bowl. In a medium bowl, whisk the milk, the sour cream, the melted butter, the orange juice and the egg until smooth.  Gently fold the wet ingredients into the dry with a rubber spatula until just combined.  Gently fold in the cranberries.

3. Scrape the batter into the prepared pan(s) and smooth the top.  Bake until golden brown and a toothpick inserted in the center comes out with just a few crumbs, around 45-50 minutes for one loaf pan, around 20-25 minutes for mini loaf pans.  Remove from oven.
4. While still in the loaf pans, drizzle a simple glaze of powdered sugar and orange juice over top. (I used about 1/3 cup of glaze)
5.  After allowing to cool in pan for 10 minutes, turn out into a wire rack and allow to cool for 1 hour before serving. 

Sunday, October 7, 2012

Julia Child's Chocolate Almond Cake

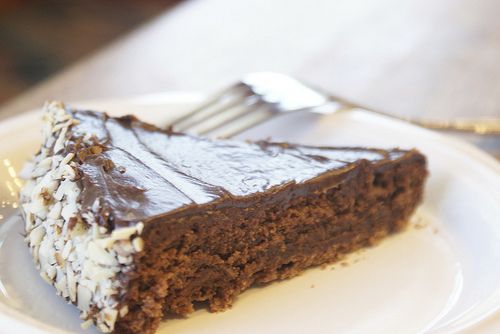
Husband often likes to tell me how much he doesn't like cake or cupcakes.  However the other weekend he found this recipe and requested I bake it for him.  Makes sense right?   Seeing as how I'm a wonderful (cough cough) wife and how I love to bake, I agreed.   I have to admit this cake is wonderful.  After eating the first piece Husband said: "Dare me to eat the whole thing."  Not on your life buddy!  I love almonds and who doesn't love chocolate.  Combine the two and I'm in heaven.    

The only difference I would make to this cake next time would be to double the recipe.    I would like it to be two layers.  Therefore I would have to double both the cake and icing recipe.

By the way..check out the icing ingredients. There are only three: chocolate, butter, and rum.  Um, Hello!  How could that possibly be bad?  

This recipe was found on Apron Strings, which is also where I took the photo from.

Ingredients:
For the Cake:
4 ounces or squares semisweet chocolate melted with 2 Tb rum or coffee
1/4 lb. or 1 stick softened butter
2/3 cup granulated sugar
3 egg yolks
3 egg whites
Pinch of salt
1 Tb granulated sugar
2/3 cup pulverized almonds
1/4 tsp almond extract
1/2 cup cake flour (scooped and leveled) turned into a sifter
For the Icing:
2 ounces (2 squares) semisweet baking chocolate
2 Tb rum or coffee
5 to 6 Tb unsalted butter
Equipment:
A round cake pan 8 inches in diameter and 1-1/2 inches deep
A 3-quart mixing bowl
A wooden spoon or an electric beater
A rubber spatula
A cake rack
A small covered pan
A larger pan of almost simmering water
A wooden spoon
A bowl with a tray of ice cubes and water to cover them
A small flexible-blade metal spatula or a table knife
Instructions:
For the Cake:
Preheat oven to 350°F (175°C).
Butter and flour the cake pan. Set the chocolate and rum or coffee in a small pan, cover, and place (off heat) in a larger pan of almost simmering water; let melt while you proceed with the recipe. Measure out the rest of the ingredients. Cream the butter and sugar together for several minutes until they form a pale yellow, fluffy mixture.
Beat in the egg yolks until well blended.
Beat the egg whites and salt in a separate bowl until soft peaks are formed; sprinkle on the sugar and beat until stiff peaks are formed.
With a rubber spatula, blend the melted chocolate into the butter and sugar mixture, then stir in almonds, and almond extract. Immediately stir one fourth of the beaten egg whites to lighten the batter. Delicately fold in a third of the remaining whites and when partially blended, sift on one third of the flour and continue folding. Alternate rapidly with more egg whites and more flour until all egg whites and flour are incorporated.
Turn the batter into the cake pan, pushing the batter up to its rim with a rubber spatula. Bake in middle level of preheated oven for about 25 minutes. Cake is done when it has puffed, and 2-1/2 to 3 inches around the circumference are set so that a needle plunged into that area comes out clean; the center should move slightly if the pan is shaken, and a needle comes out oily.
Allow cake to cool in the pan for 10 minutes. Run knife around the edge of the pan, and reverse cake on the rack. Allow it to cool for an hour or two; it must be thoroughly cold if it is to be iced.
For the Icing:
Place the chocolate and rum or coffee in the small pan, cover, and set in the larger pan of almost simmering water. Remove pans from heat and let chocolate melt for 5 minutes or so, until perfectly smooth. Lift chocolate pan out of the hot water, and beat in the butter a tablespoon at a time. Then beat over the ice and water until chocolate mixture has cooled to spreading consistency. At once spread it over your cake with spatula or knife, and press a design of almonds over the icing.
Yield: For an 8-inch cake serving 6 to 8 people

Sunday, September 30, 2012

Banana Bread

I don't know what it is about this Banana bread recipe but it's awesome.  It's super simple. There aren't a lot of ingredients.  There are no complicated steps to it.  Yet it tastes wonderful. 

I've found there is also nothing like banana bread.  We eat a lot of bananas in our house but if two start too look like they are getting too ripe I always get excited. Because that means I get to make banana bread soon.  Lucky for me Husband doesn't really like banana bread so I get it all to myself. Unless I add chocolate chips.  If I add chocolate chips he usually decides to eat some of it.   I also don't cook it completely.  I like the top/middle to be a tad raw still. I know, not healthy, but oh so yummy.

Ingredients
2 bananas (smashed)
1/3 cup butter
1/2 cup sugar
2 eggs
1 3/4 cup flour
1 tsp baking powder
1/2 tsp baking soda
1/2 tsp salt

Directions
Preheat oven to 350.

Cream sugar and butter.   Mix together the flour, baking powder, baking soda, and salt.   Combine flour mixture with sugar and butter mixture.  Add the eggs.  Add the bananas.    Bake for 40-45 min.

If you are addicted to chocolate like I am, adding a package of chocolate chips after mixing in the bananas is often a great variation to this simple bread.

Sunday, September 2, 2012

Fudge Revel Bars

I haven't posted a recipe in awhile so I thought I would make your day and do that!  Of course, after you read this recipe and click on the link to see the pictures you might hate me. It would be a love/hate relationship though.  Your taste buds will love me, your stomach/thighs/arse might not. haha!

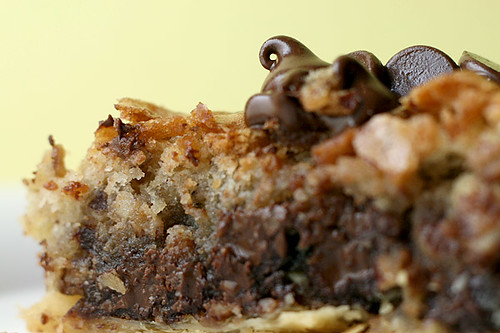
I have to admit I've had this recipe for awhile but only made it for the first time several months ago. As my husband says, it basically tastes like one big gooy chocolate chip cookie.  What's not to love?

I got the recipe for these from Mandy's Recipe Box.   I'm stealing her picture, but since her blog name is on it I think it's ok.  Plus I'm giving her credit.


After looking at that, what's not to love!  Oh..and my profile picture?  I'm wearing the baby and making these. Perfect!

It wouldn't be right if I didn't give you some tips.  First, look at the directions and you'll see that it really isn't hard at all. It's a very simple recipe.  Second, my only tip, I have one of those non-stick pads that you put on cookie sheets so cookies and stuff don't stick. I just put one of those on my cookie sheet and then I don't have to spray it or anything.  After I cut it into bars they peel right off. So if you have one, I recommend using it.   Third, I don't use a jelly role pan. I do use just a normal cookie sheet.  For the simple reason that I don't have a jelly role pan. haha

Here's the recipe:

Fudge Revel Bars
1 c. butter
2 eggs
2 c. brown sugar
1 tsp. salt
1 tsp. baking soda
2 1/2 c. flour
2 tsp. vanilla
3 c. quick oats
Cream together the butter, brown sugar, and eggs. Add the vanilla. Add the salt, baking soda, and flour. Mix. Add oats and mix well. Press 2/3 of the dough into a greased cookie sheet with edges (aka jelly roll pan. It's about 10x15 or so).

Fudgey Goodness
1 can (14 oz.) Sweetended Condensed Milk
1 pkg milk chocolate chips
1 Tbsp. butter
1/2 tsp salt
Put all into a microwave safe bowl and microwave for 1 minute and stir. Keep cooking at 30 second increments and stirring until melted. Pour over the dough and spread out. Sprinkle the rest of the dough over the fudge. Bake at 350 for 20 min.

Sunday, March 18, 2012

Blackberry Cobbler Recipe


I love blackberries, to the point that we have a blackberry bush in our yard so I can eat fresh blackberries during the summer and freeze for the winter.  I've tried several blackberry cobbler recipes and this is by far my absolute favorite and the only one I make now.  My family also agree's that this is the best one they've had.

Blackberry Cobbler
c. Television Food Network, G.P.

Ingredients
2 1/2 cups blackberries
2/3 cup sugar
1 1/2 cups flour
1 tablespoon baking powder
1/2 teaspoon salt
8 tablespoons (1 stick) plus 2 tablespoons unsalted butter
1/2 cup heavy cream, whipped, sweetened

Directions
Preheat oven to 350 degrees F.
Into a buttered shallow baking dish place blackberries. Sprinkle with 1/3 cup sugar.

In the bowl of a food processor combine flour, baking powder, and salt. Add butter and pulse to create lumpy mixture. Add cream and pulse until dough forms. Dough will be soft.

Spoon dough over blackberries.

Melt remaining 2 tablespoons butter and drizzle over mounds of dough.

Sprinkle with remaining 1/3 cup sugar.

Bake about 30 to 40 minutes or until dough and fruit are cooked through and dough is lightly browned.

Serve with whipped sweetened cream.

Saturday, March 3, 2012

Neil's Pancakes - recipe

Or as I would rather call these pancakes..the best fing pancakes I've ever had.  Does that give you an idea of how wonderful these are?

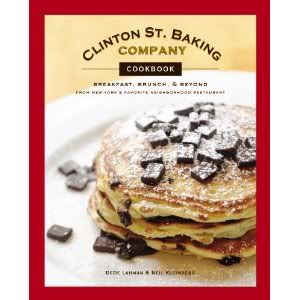
This is yet another wonderful recipe from the Clinton St. Baking company cookbook. I really need to start cooking from other cookbooks and online to give you guys variety.  At least this recipe isn't a dessert.

I love pancakes and tend to make them on the weekend, then freeze all the ones I don't eat so I can have a quick breakfast either during the week or future weekends.  This recipe makes a ton of pancakes.  The recipe also has a lot of steps and there's a lot more to it than just making pancakes from a box (which I never do) or the easy recipe I normally use to make them from scratch.  However because it makes so many it's not something you would be making every weekend. Plus, as you've noticed by now, I love recipes that require a bit more than just throwing the ingredients in a bowl and mixing.

Sorry..no photo of these. I really need to start taking photo's don't I?

Neil's Pancakes

Ingredients
4 cups all-purpose flour
1 tablespoon baking powder, plus 1 teaspoon
3/4 cup sugar
1 teaspoon salt
6 large eggs, separated
3 cups whole milk (I didn't use whole milk as I don't keep it in the house)
3/4 cup unsalted butter, melted
1 teaspoon vanilla extract

Measure and sift all the dry ingredients into a large (preferably stainless steel) mixing bowl: flour, baking powder, sugar, salt.

In another bowl, whisk together the yolks, milk, melted butter, and vanilla until combined.  Whisk the wet mixture into the dry mixture. The result should be slightly lumpy, yet combined to form a batter.

Whip the egg whites in a medium bowl until they reach medium peaks (soft in the middle). You can either whip them by hand with a whisk or put them in the bowl of an electric mixer to whip.  Be careful, you don't want to overwhip the egg whites.

Gently mix half of the whipped whites into the batter with a large rubber spatula.  Then gently fold the remaining half into the batter.  Remember: this batter should be slightly lumpy and have large parts of egg whites not fully incorporated; it should look like whitecaps in the ocean with foam on top. (The batter will last a few hours in the fridge without deflating too much.)

Heat a griddle - either an electric griddle, a stovetop griddle, or a big flat pan to 350 to 375 d. F.  Grease the hot griddle with some butter.  Drop 1/4 cup (approximately 4 tablespoons) of pancake batter on the griddle and cook to set.    When you see bubbles start to form on top, lift the pancake halfway to see if it's golden brown and crispy on the edges. If ready, flip the pancake.

Monday, February 20, 2012

Peanut Butter Cereal Treats Recipe

I was going through an old copy of a cooking magazine I had laying around the house and tore out recipes I thought Husband would enjoy.   They were sitting in a stack on the kitchen table and when eating breakfast on Saturday he pushed this one towards me with a grin.  It didn't take genius to learn this is the one he wanted me to make next.

This is different from what I usually make but man it's pretty darn good.  I'll list the recipe and instructions as it comes and then put my comments below.

Peanut Butter Cereal Treats

30 large marshmallows
3 tbsp butter
1 tbsp peanut butter
6 cups peanut butter cap'n crunch
1 1/2 cups milk chocolate m&m's

In a large saucepan, combine the marshmallows, butter, and peanut butter.  Cook and stir over medium-low heat until melted.  Remove from the heat.  Stir in the cereal an M&M's.

Pat into a 13x9-inch pan coated with cooking spray.  Cool. Cut into bars.


I actually followed the recipe as indicated except I used multi-grain peanut butter cheerios instead of cap'n crunch cereal.  I figured the cheerios had to be a bit healthier and we would be more likely to eat what was left over that way.

After making this there are a couple of things I would change.  30 large marshmallows isn't exactly one whole bag but it's somewhat close.  I would just add the entire bag next time, minus the ones I eat.  Is it just me or do others forget how good marshmallows are until you have a bag in front of you and decide to snack on one?  Also, the m&m's was almost an entire bag so this is one that next time I would just dump in the entire bag instead of measuring. Ok..and minus the ones that I decide to eat because who can resist eating m&m's?  Although I suppose if you buy one of the large sized bags you would want to measure. or not.

Monday, February 6, 2012

Cherry Stollen or Cherry Bread Braid Recipe

This recipe is an old family favorite.  Well, it's not a family recipe but it's a family favorite.  My paternal Grandma used to make this for Christmas every year when I was growing up.  A couple years ago I remembered it and asked her for the recipe, we hadn't had it in years.   It was at this point that she mentioned she got it from one of her friends.  I figure I don't care, as far as I'm concerned it's a family tradition now.  Husband and I took over having Christmas at our house a couple of years ago and I have made this a staple. I don't really make it at any other time of the year, but it makes 4 so I always bake two and freeze two.  The reason you are getting this recipe now is because I needed room in the freezer and pulled one out to bake.  I've been in a happy cherry stollen coma for a couple of days.

I don't have pictures of what mine look like, because they do not look great. They test great, appearance is something I'm working on. Instead I've just posted a picture I found online.   In fact, I found a posting for a different braid bread recipe on reliable answers and the photo's show you exactly how to do the dough part.


Stollen or Braid Bread Recipe

Makes 4

Ingredients
1 lb butter, softened (4 sticks) (I ALWAYS use salt free butter when baking)
1 lb smooth cottage cheese *
4 1/2 cups flour
pie filling of your choice (1 can makes 2 stollens, or use fresh fruit)

*I haven't been able to find smooth cottage cheese so I just puree normal cottage cheese until it is smooth

Mix the butter, cottage cheese, and flour together until well mixed.  I have a habit of combining the butter and cottege cheese until well mixed and then adding in the flour.  I'm not sure it matters though.

Divide dough into 4 parts.  Place in the refrigerator until cold or over night.

When you are ready to make the stollens, remove one piece at a time as you don't want it to get too soft.  Roll dough out on parchment paper into an oval shape.  Size depends on you, I always treat it like a pie shell and do about the same thickness.    If you are going to cook right away, it's easier to then place this on a cookie sheet before doing the next step.

Pour fruit down the center of the rolled dough.  Half a can per stollen.  Cut the dough on the sides into strips and twist over the fruit.  If you are going to freeze any of these, now is when you would freeze it (before baking).

Bake at 350 for about 30 min.

Once out of the oven, while still hot, make a thin icing to drizzle on top.  I don't measure this,  I just mix powdered sugar with a bit of vanilla and a tad of milk.  I get the consistency I want and then drizzle.  You don't have to use vanilla, I just love the flavor of it so I always do.

Saturday, January 28, 2012

Easy Brownies from scratch

I mentioned before that there are basically two cookbooks I own for baking and that's because so far they are the only ones I've felt worth it.  Clinton St. Baking Company is a heck of a cookbook.  The recipes are all from the cafe of the same name that can be found in New York.  I can't tell you how much I hope to eat there one day.

I wanted to share their recipe for brownies.  Hopefully you'll make them and this will entice you to pick up a copy of the book, if you do I don't think you'll be disappointed.

The brownies are super easy to make and taste wonderful.  I personally have all the ingredients in my house most of the time so it's not something where a special trip to the store is required.  psst..I've posted the Flourless Chocolate cake recipe on my other blog in the past, this one has become a favorite dessert for my husband. He rates it as the best dessert he's ever had. I'm not as huge a fan but admit it's good. I actually prefer these brownies. Oh, and as I'm typing this Husband is going through the recipe book picking out the next item for me to make.  He's mentioned 3 so far. haha!

Brownies

Ingredients
2 1/2 cups semi-sweet chocolate chunks (I just use a bag of chocolate chips)
2 cups sugar
2 sticks unsalted butter, cubed
5 large eggs
1/2 tsp vanilla extract
2 cups flour
1/2 tsp baking powder
1/2 tsp salt

Preheat oven to 350 F.  if using a convection oven, set it at 325.  Lightly grease a 9x12 pan, line with parchment paper to prevent sticking and grease paper (I just spray the pan).

Melt the chocolate, sugar, and butter together in a microwave-safe bowl in the microwave on high heat.  stir at 1-minute intervals.  The total time to melt this mixture will be 2 1/2 - 3 minutes. Or melt the mixture in the stainless-steel bowl of a double boiler.  Let cool.

Whisk the eggs and vanilla extract into the warm chocolate mixture.

Sift the dry ingredients into a separate bowl.

In two stages, gently fold the dry ingredients into the wet batter until combined.

Evenly distribute the butter into the prepared pan.

Bake the brownies for 25 minutes, until the top is cracked and the center is still fudgy.

Allow the brownies to cool in the refrigerator overnight and cut into approximately 3-inch squares once cooled.

Monday, January 16, 2012

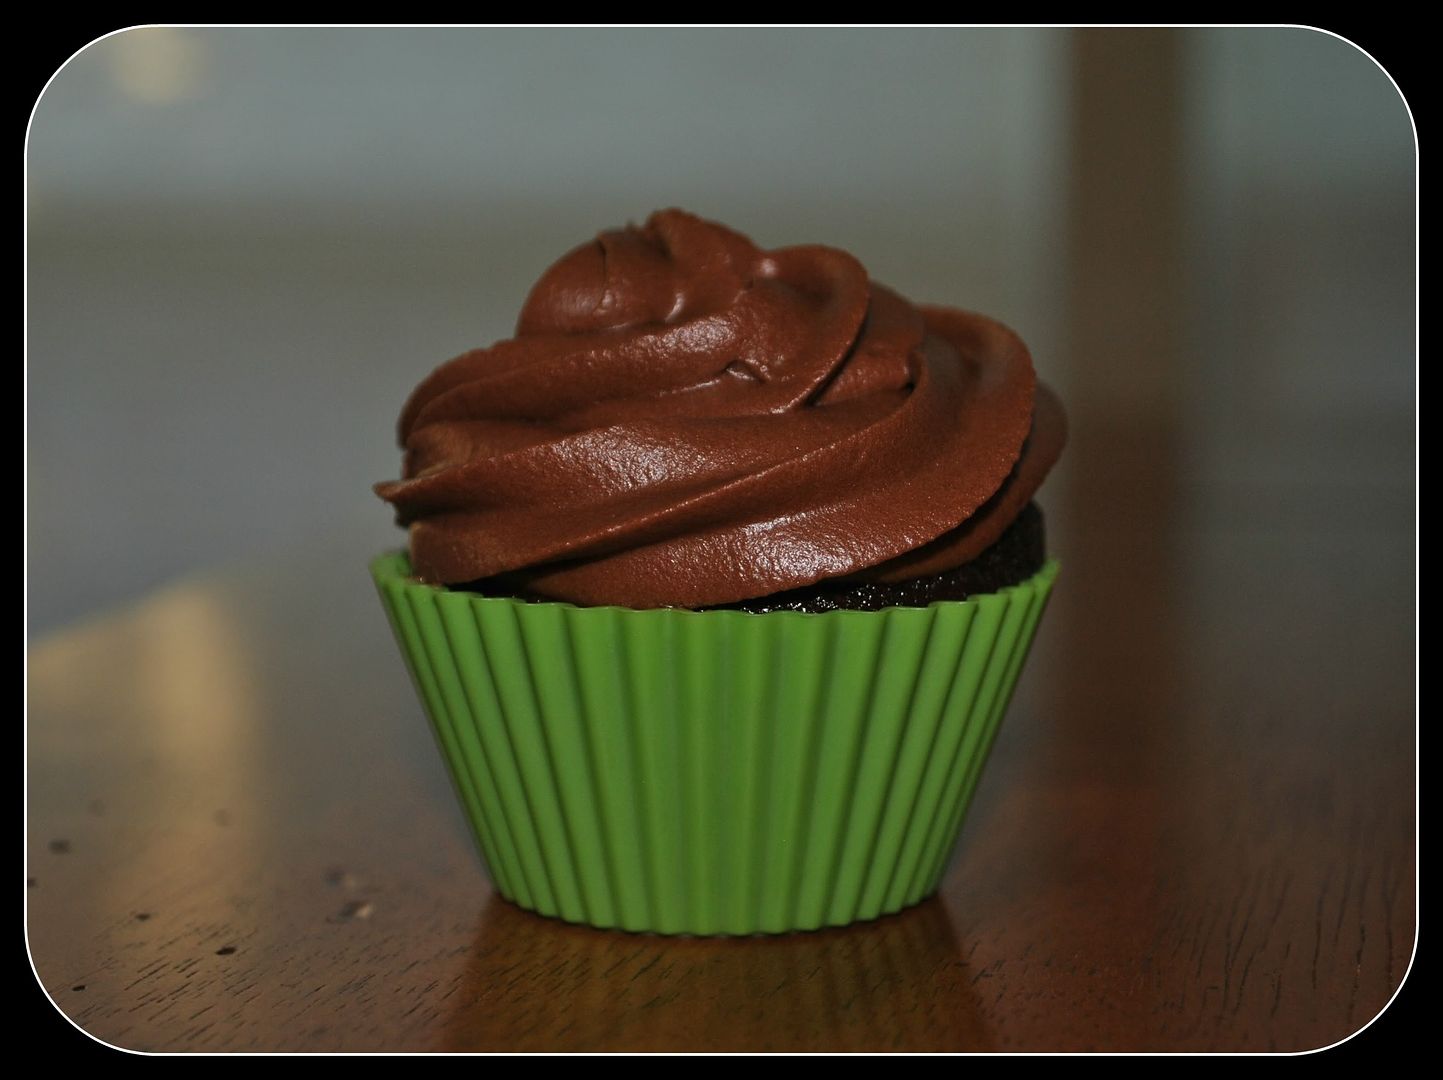
Chocolate Cupcakes and Buttercream Frosting

We had my family over to celebrate my Mom's birthday the other night and my Mom had requested chocolate cupcakes with chocolate icing for the dessert.    Since I refuse to buy desserts I turned to one of my trusty cookbooks to see if there was a recipe before I went searching on the internet.   I found a recipe for chocolate cupcakes in the book Flour by Joanne Chang.  If you live in Boston or have been there, you might be famliar with the Flour Bakery.  Man I hope to get there one day. I actually have to admit that so far I only have two cookbooks and both are recipes from bakeries and both are awesome. The only cookbooks I've felt worth spending money on so far.  However..let me get back on track.

This was the first time I made the cupcakes so of course we didn't know what to expect. I tend to make new dessert recipes when people are coming over, no better way to test it all out.    These cupcakes weren't hard to bake, a few different steps, but not hard.  While I love chocolate I'm not a huge fan of chocolate cake.  I have to admit that I've been eating my share of these, they taste wonderful.  Everyone who had one also commented on how good they are (and I don't think it was just to make me feel good since I baked them).    I didn't make the icing recipe included with that recipe as it wasn't for a chocolate recipe. Instead I used a chocolate buttercream recipe that I've had for several years, found it on the internet but don't remember where.

If you feel like a chocolate cupcake and are up to baking from scratch, definitly give these a try.

Chocolate Cupcakes from Flour by Joanne Chang

2 ounces unsweetened chocolate, chopped
¼ cup dutch-processed cocoa powder
1 cup granulated sugar
½ cup unsalted butter
⅓ cup water
½ cup milk
1 egg
1 egg yolk
½ tsp vanilla extract
1 cup flour
1 tsp baking powder
½ tsp baking soda
½ tsp kosher salt

In a heatproof bowl, combine the chocolate and cocoa powder.  In a small saucepan, heat the sugar, butter, and water over medium-high heat, whisking occasionally, for 3-4 minutes or until the butter is melted and the sugar is dissolved.  Pour the hot butter-sugar mixture over the chocolate-cocoa mixture and whisk until the chocolate is completely melted and the mixture is homogeneous.

Whisk the milk, egg, egg yolk, and vanilla into the chocolate mixture until thoroughly combined.

In a bowl, stir together the flour, baking powder, baking soda, and salt until well mixed.  Dump the flour mixture on top of the chocolate mixture.  Whisk until the dry ingredients are totally mixed into the chocolate mixture.  Let the batter sit for at least 1 hour at room temperature, or transfer to an airtight container and store in the refrigerator for up to 3 days. (This allows the liquid to be totally absorbed into the batter, so the batter thickens up a bit and isn’t so soupy.)

Preheat oven to 350 degrees F.   Spoon the batter into the prepared muffin cups, dividing it evenly and filling the cups to the rim.  Bake for about 30 minutes, or until the tops spring back when pressed with a fingertip.  Let cool completely in the pan on a wire rack.

**I did make only 12 cupcakes but some were pretty large and overflowing.  Next time I make these I won't fill the cupcake cups to the rim and I'll make more.


Buttercream Frosting
6 tablespoons butter, softened
⅓ - ¾ cup Cocoa powder
2 ⅔ cup powdered sugar
⅓ cup milk
1 tsp vanilla extract

Cocoa powder - for light chocolate frosting us ⅓ cup cocoa powder.  For medium chocolate frosting use ½ cup cocoa powder.  For dark chocolate frosting us ¾ cup cocoa powder.

Directions
Cream the butter.  Add the cocoa and powdered sugar, alternately with milk.  beat to spreading constistantency, add more milk if needed.  Blend in Vanilla.

Makes enough for 12 cupcakes
 
**Note: I use this recipe for non-chocolate buttercream frosting too, I (obviously) just don't add the cocoa powder

Tuesday, April 19, 2011

Dye your Easter Eggs..naturally!

Photo linked from Adventures on Cooking
I might be late in posting this, seeing as how Easter is this Sunday and most of you probably already dyed your Easter Eggs. However, for those who put the "pro" in procrastination like I do, this is just in time. snicker.

I don't have kids yet so I haven't dyed Easter eggs in years.   However, I imagine one day I'll need to dye eggs again and I'll be keeping this info handy.

Photo linked from Boulder Locavore
Instead of using chemicals to dye your eggs, because you know that's going to end up on the eggs and you'll be eating it right?  How about using natural ingredients to dye them?  Sounds awesome!  The only thing that worries me a bit is..what if it seeps through cracks and does get on the egg, will it change the flavor?  Guess I won't know till I try it.

Since I haven't tried this, I'm not posting photo's or directions but rather I want to link to two different blog posts.  One shoes you how to naturally dye the eggs and gives you directions on how to do it.  The other shows you how to stencil eggs using herbs...trust me, you just have to see it.

Boulder Locavore is your stop for naturally dyed eggs.
Adventures in Cooking is your stop for stenciled eggs.